When you own a domain name, you may have come across the term nameserver or NS records. These are crucial elements in domain management and internet infrastructure systems. Understanding how they work will help you ensure that your website is accessible to users worldwide and functions smoothly. Let’s take a deep dive into how nameservers, NS records, and domains function, and how the right server can align with specific nameservers for optimal performance.
Table of Contents:
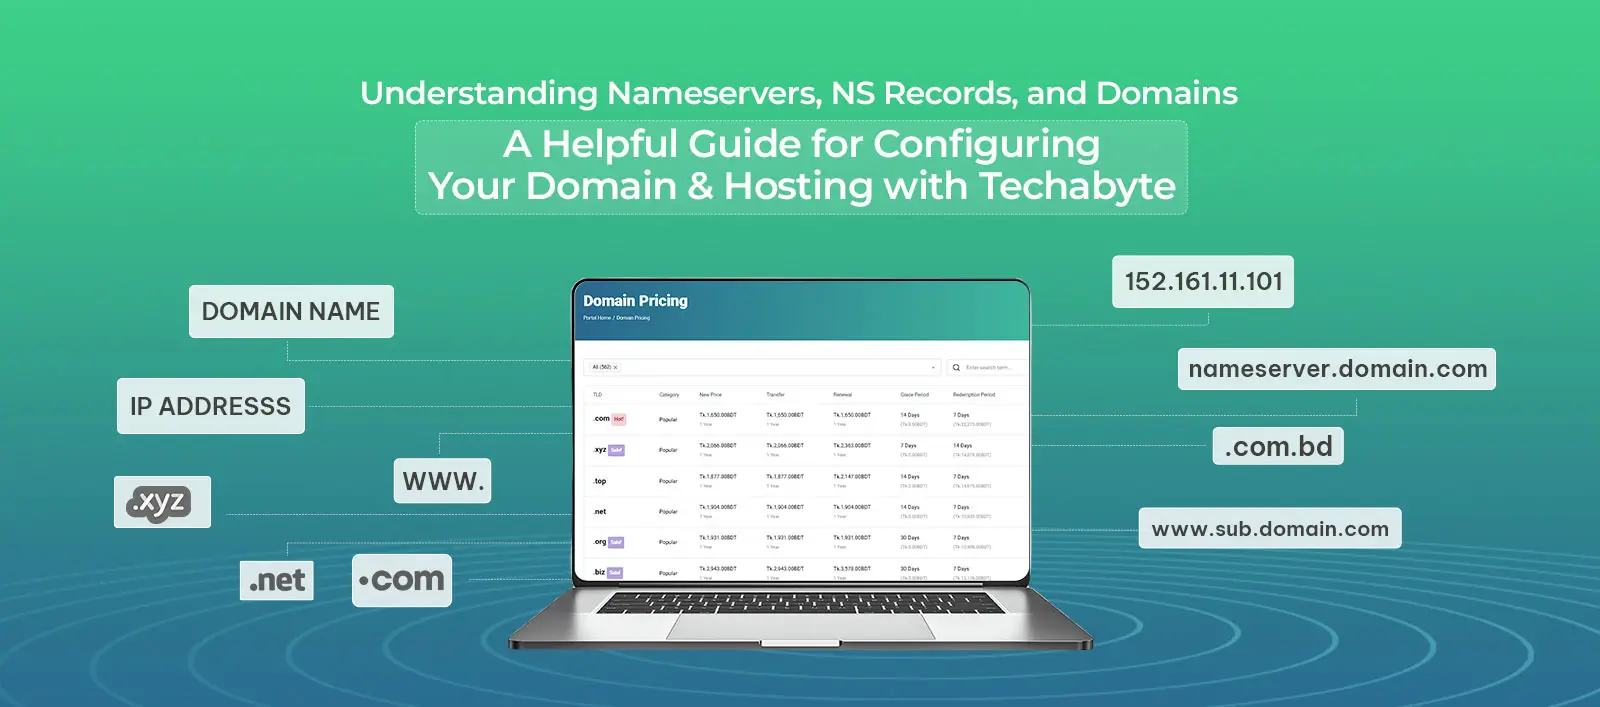
What Are Nameservers (NS)?
A nameserver is a critical part of the Domain Name System (DNS), which is the system that translates human-friendly domain names (like www.example.com) into machine-readable IP addresses (such as 192.168.0.1). When you type in a website’s domain name, the DNS system is responsible for ensuring that the request gets routed to the correct server hosting the website.
Nameservers play the role of directing traffic to the correct IP address. Each domain has a set of nameservers associated with it. These nameservers are responsible for pointing your domain to the server where your website and other services are hosted.
How Do NS Records Work?
NS records are a specific type of DNS record that tells the internet where to find the nameservers responsible for a particular domain. An NS record contains the domain name of the nameserver and directs queries to it. If you own a domain and set an NS record to point to a nameserver like ns1.yourhost.com, whenever someone types your domain into their browser, the query will be routed to that nameserver. The nameserver will then respond with the IP address of the server hosting the website.
There are two main types of NS records:
- Primary Nameservers (Master NS): This is the first nameserver in the list and the most authoritative source of DNS information.
- Secondary Nameservers (Slave NS): These serve as backups to ensure your domain is still reachable if the primary nameserver is down.
The Role of Nameservers in Domain Management
To properly manage a domain, you need to specify your nameservers so that DNS queries are directed to the appropriate host. When you purchase a domain, your registrar often provides default nameservers, which can be used unless you want to customize them for a specific hosting provider or service.
What Server Is Suitable for a Specific Nameserver (NS)?
Not all nameservers are created equal, and the server you choose for your nameserver can depend on a variety of factors, including geographic location, hosting service, and scalability. It’s important to use a server that’s optimized for DNS performance and has sufficient redundancy to ensure uptime.
Different Types of Servers and Their NS Records
Depending on where your hosting service is located or the service you use, the nameserver records might differ. Here’s a look at some common nameserver configurations:
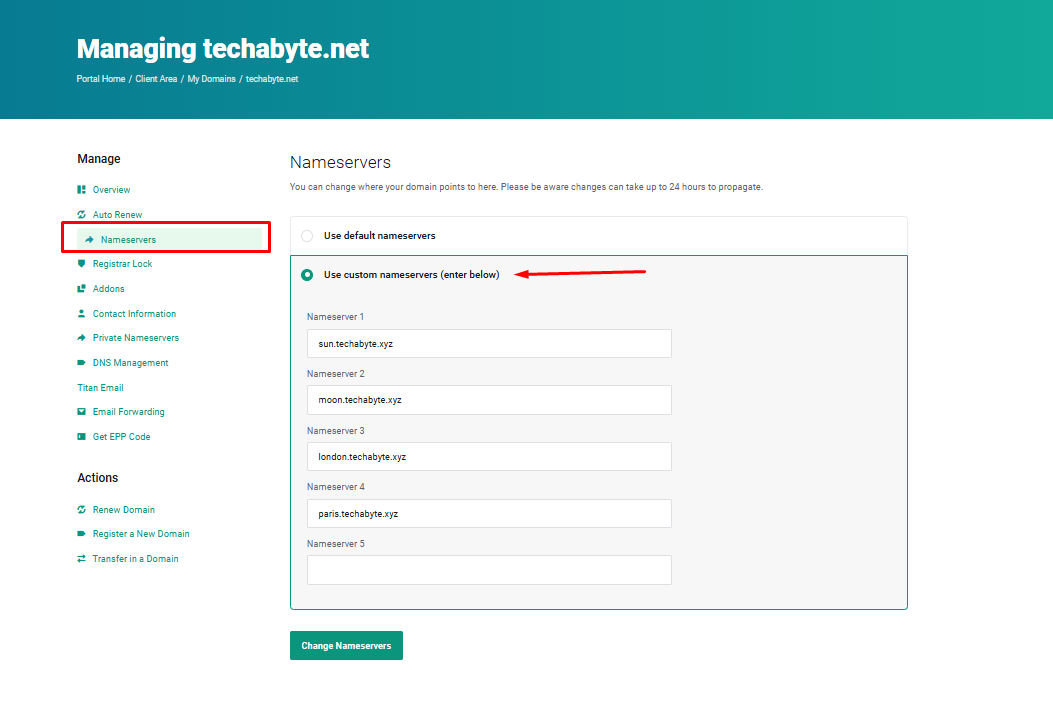
1. Techabyte Default Nameservers
Techabyte offers robust DNS services for its clients. If you’re using Techabyte for hosting, you can leverage the following default nameservers:
- sun.techabyte.xyz
- moon.techabyte.xyz
- london.techabyte.xyz
- paris.techabyte.xyz
These nameservers are configured for optimal DNS performance and are suitable for a variety of hosting packages.
2. BDIX Connected/BD Datacenter Shared Hosting Nameservers
For users utilizing shared hosting plans (Startup, Turbo, Premium, Reseller) provided by BDIX Connected or the BD Datacenter, the following nameservers are in place:
- sun.techabyte.xyz
- moon.techabyte.xyz
These nameservers are optimized for hosting within Bangladesh and are designed to provide low latency for local traffic.
3. Europe and USA Data Center Nameservers
If you’re hosting in Europe or the USA (France, London, Germany, or USA Data Center), you can use the following nameservers:
- london.techabyte.xyz
- paris.techabyte.xyz
These servers ensure that your website has faster access times for European and US users by reducing latency and improving load times.
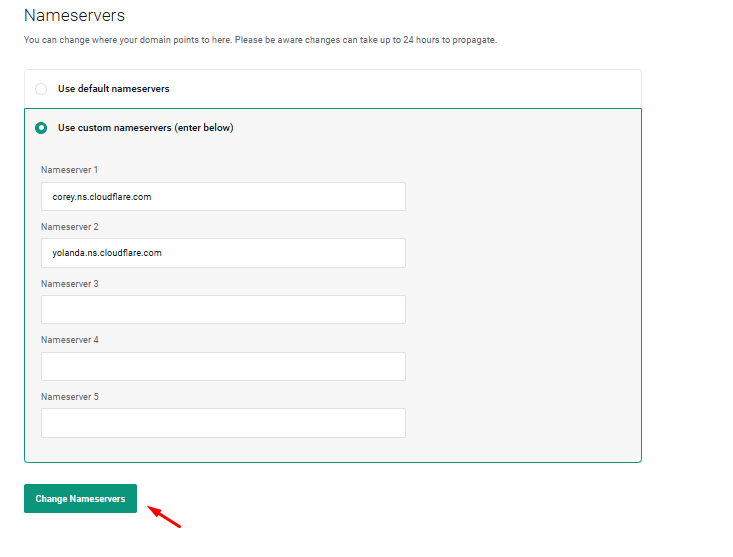
4. Cloudflare Nameservers
If you’re using Cloudflare to manage your domain, you’ll be assigned unique nameservers through your Cloudflare account. These nameservers are specifically configured to work with Cloudflare’s content delivery network (CDN) and security features.
Once you’ve signed up for Cloudflare, your assigned nameservers will help with DNS management, security (like DDoS protection), and website performance.
Let’s see the steps to get it done:
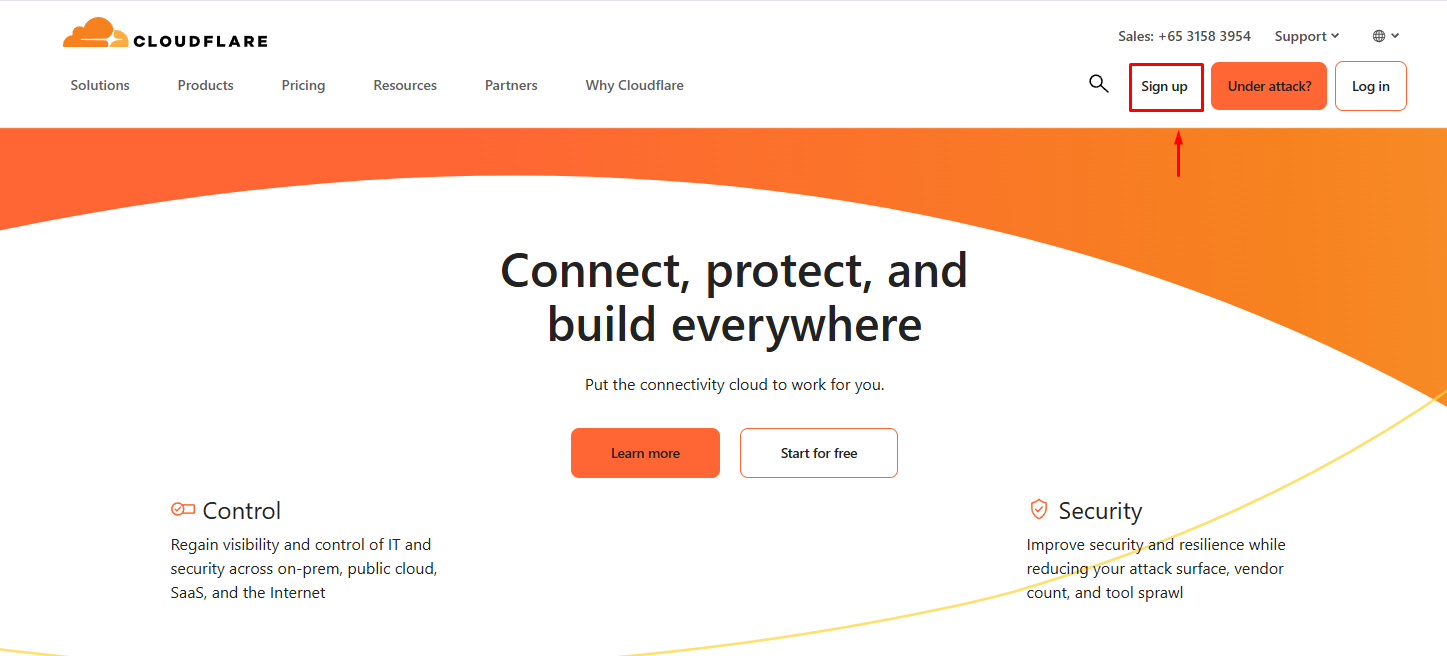
1. Open an account in Cloudflare
– Go to the [Cloudflare website] (https://www.cloudflare.com/)
– Click on the Sign Up button at the top-right of the page.
– Enter your email address and create a password.
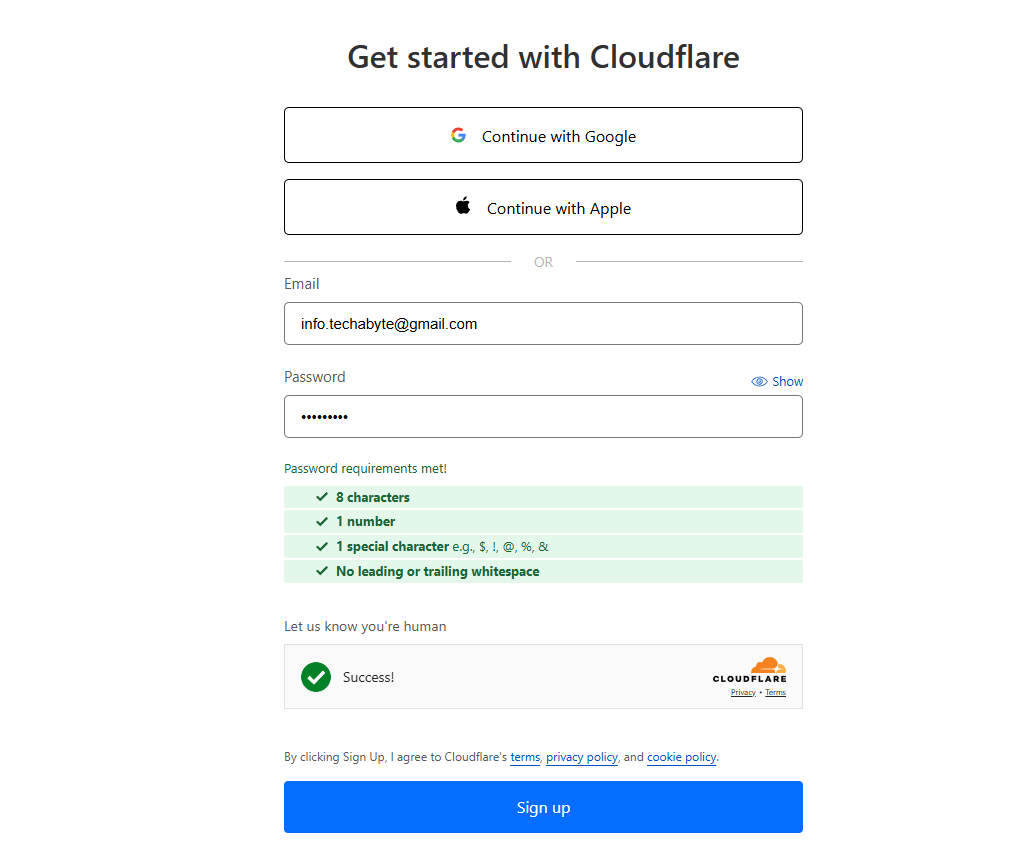
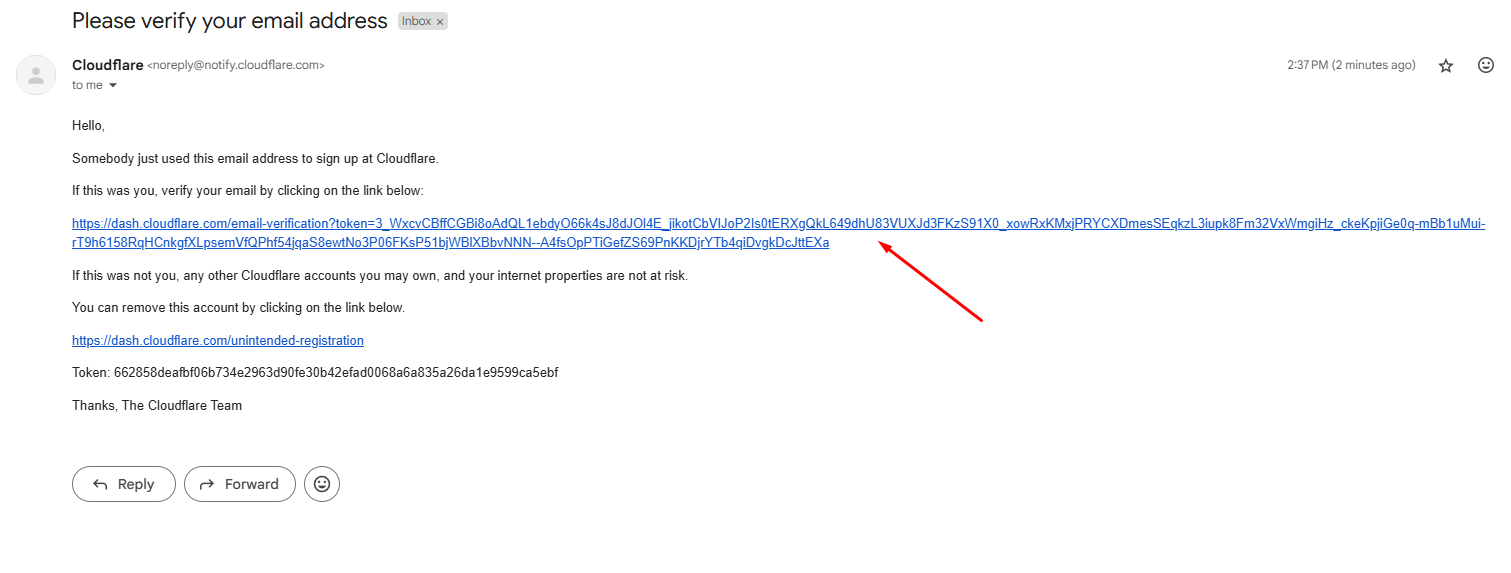
– You’ll receive a verification email to confirm your account. Click the link to activate it.
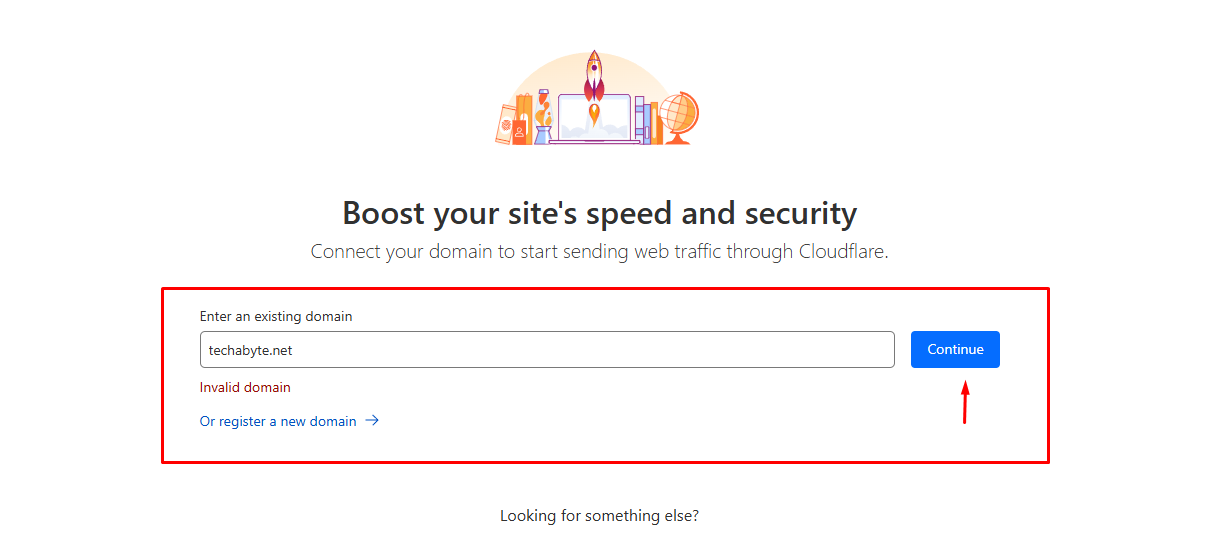
2. Select a plan
– After signing in, you’ll be asked to add your website.
– Once your domain is added, Cloudflare will display available plans: Free, Pro, Business, and Enterprise.
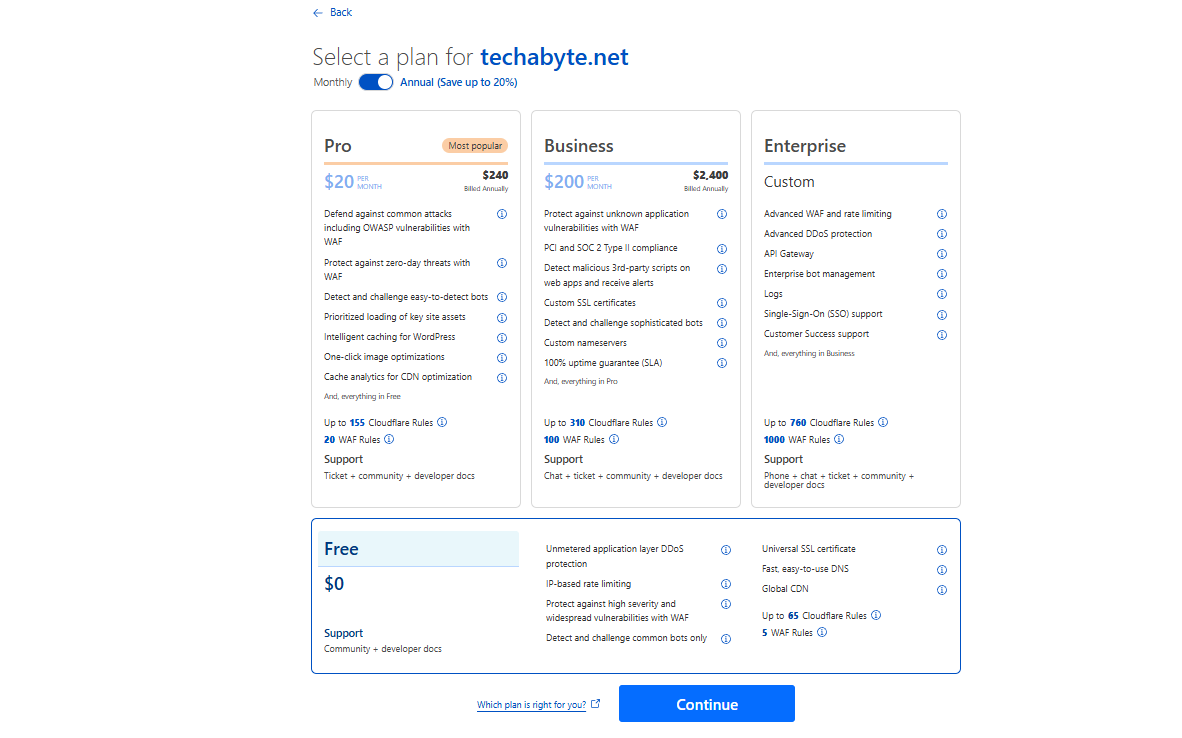
– You can choose based on your needs. For most individuals and small websites, the Free plan will be sufficient. If you need more features, you can opt for the Pro or higher tiers.
– By clicking on the continue you will get cloudfare name servers which you will need to connect to your domain.
3. Update the name server
– When you add a domain to Cloudflare, the service automatically generates name server addresses for you.

– You need to update the Name Servers in your domain registrar’s settings (where you bought your domain)
Step 1:
Step 2:
Step 3:
– Cloudflare will provide two unique name server addresses, which you copy and paste into the registrar’s DNS settings.
4. Manage DNS records
– After your domain is added to Cloudflare and the name servers are updated, log into your Cloudflare dashboard.
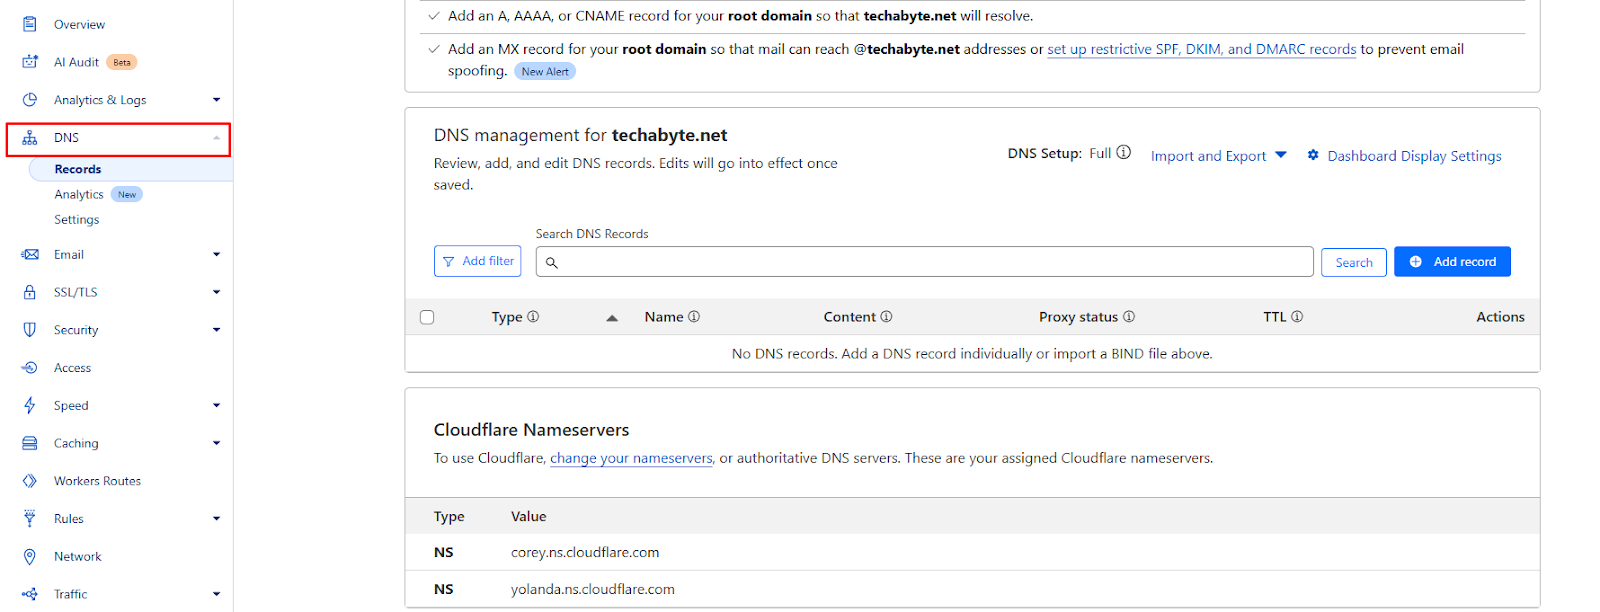
– Navigate to the *DNS* tab.
– Here, you can manage DNS records like *A, **CNAME, **MX, and **TXT* records by clicking *Add Record* and filling in the required details.
– You can add or modify records based on your needs (e.g., setting up email, websites, subdomains).
5. Techabyte Domain Nameservers (Client Area Management)
If you wish to edit, add, or modify records (such as child nameservers or custom DNS settings), Techabyte provides the following nameservers through its Client Area:
Just follow the same steps as above:
(Follow the Steps if you are connected with USA/EU server)
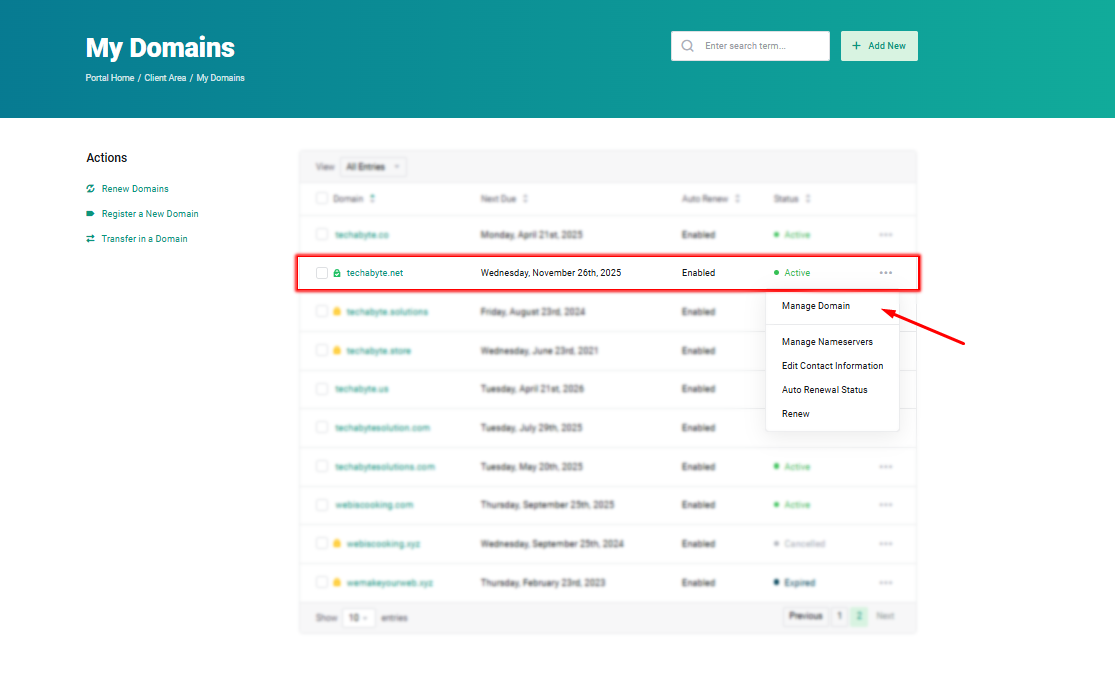
– Go to domains – my domains – find your selected domain and then click on the action button (manage nameservers)

Step 1:
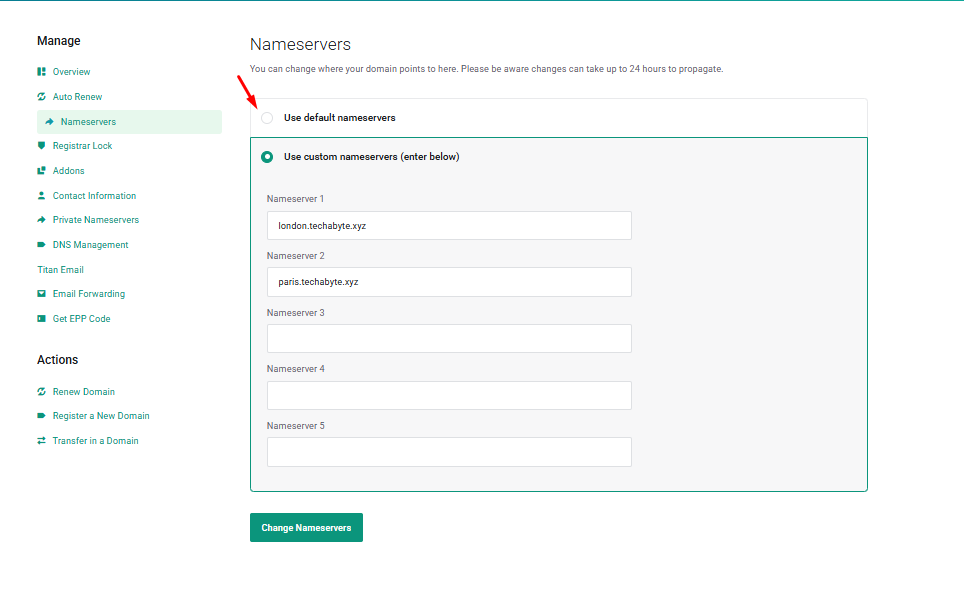
Go to name server – click on “Use default name servers” – here you will see the list of your name servers.
Note: If it’s connected to the USA server, then you will need to manage your DNS from cPanel.
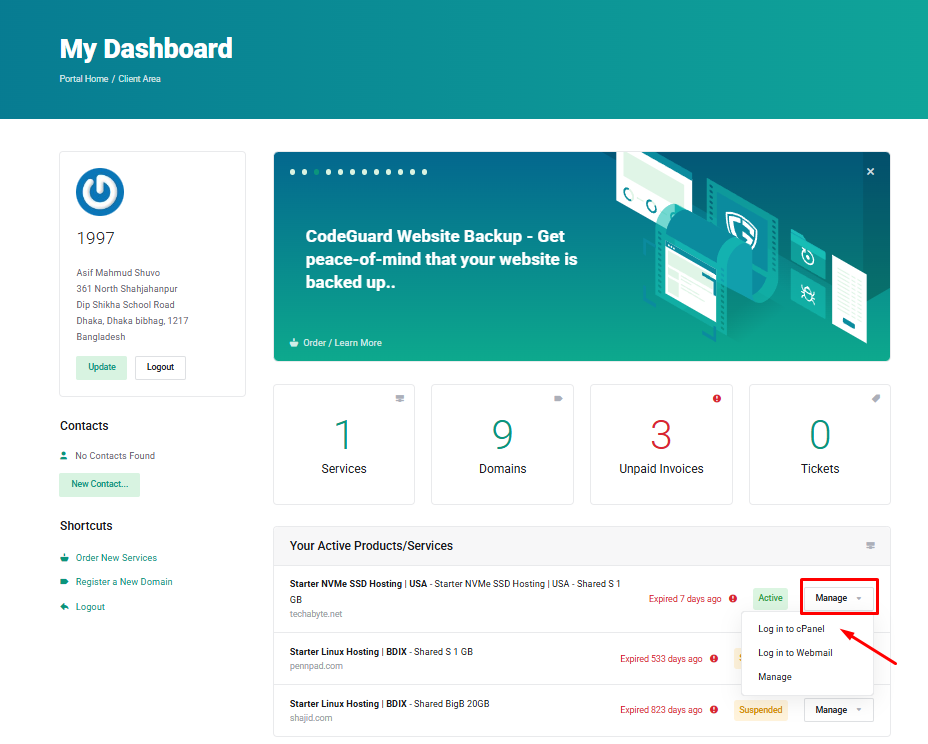
Step 2:
Go to dashboard – click on the manage – click on the cPanel
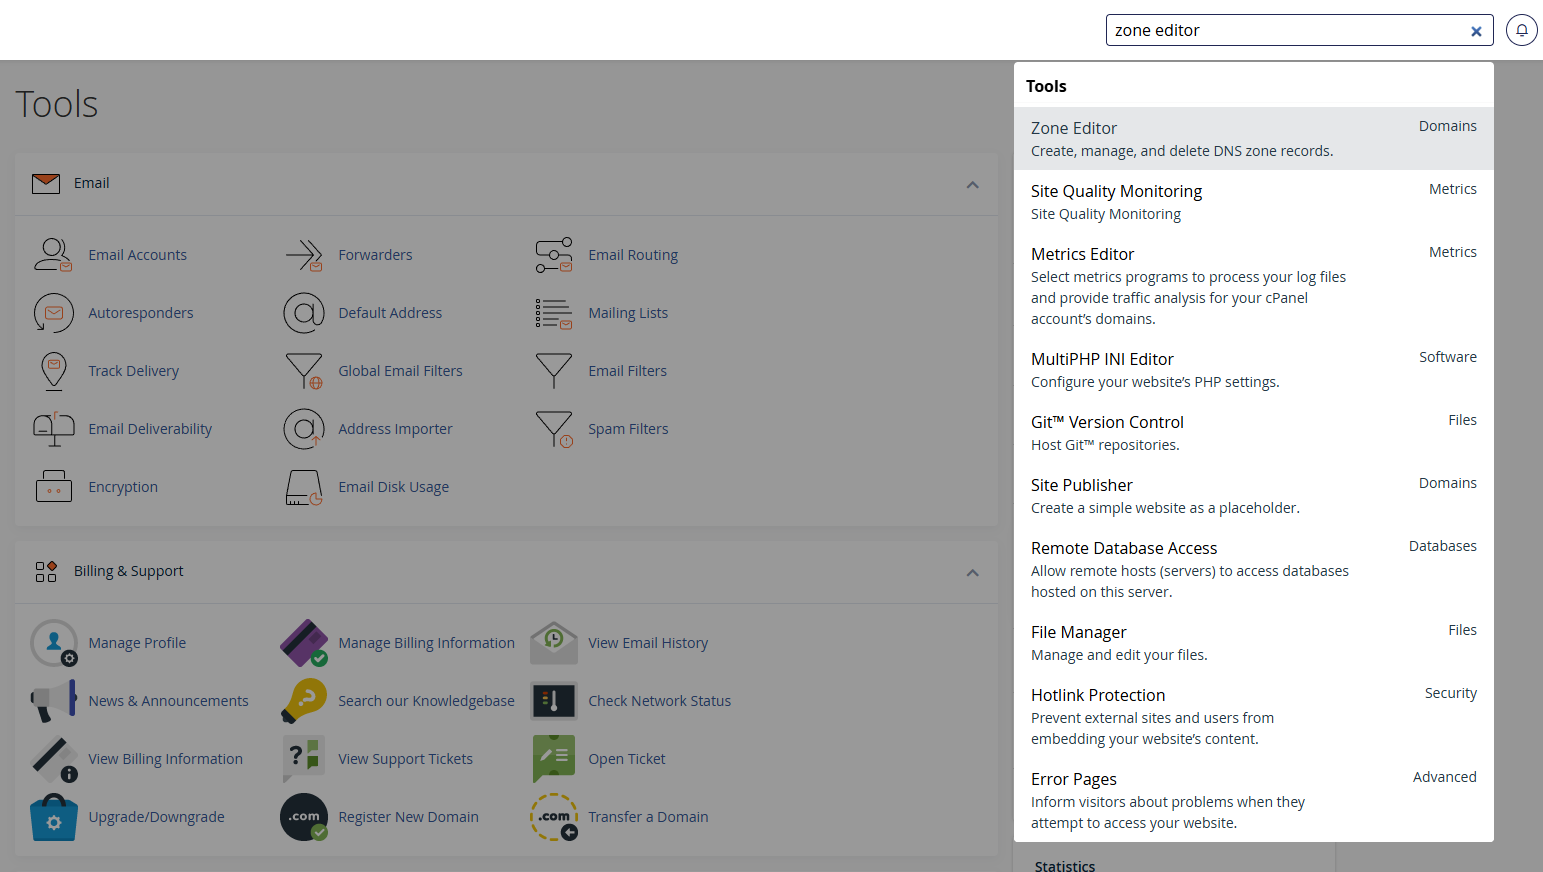
Step 3:
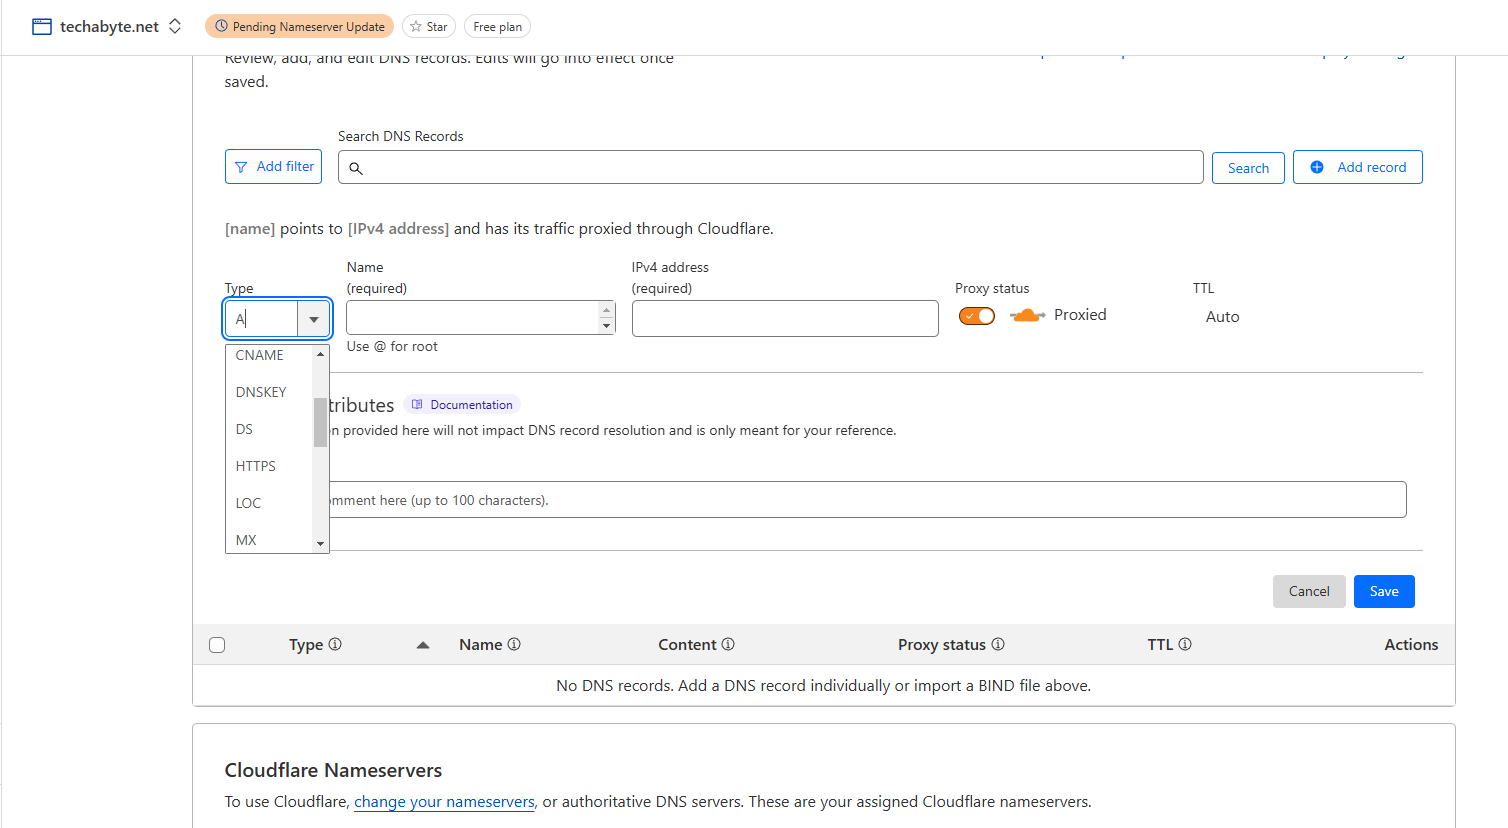
Go to the cPanel – search zone editor – click on the zone editor option
Step 4:
After clicking on the Zone editor – you will find all the list of DNS types. So, from here you can manage your DNS.

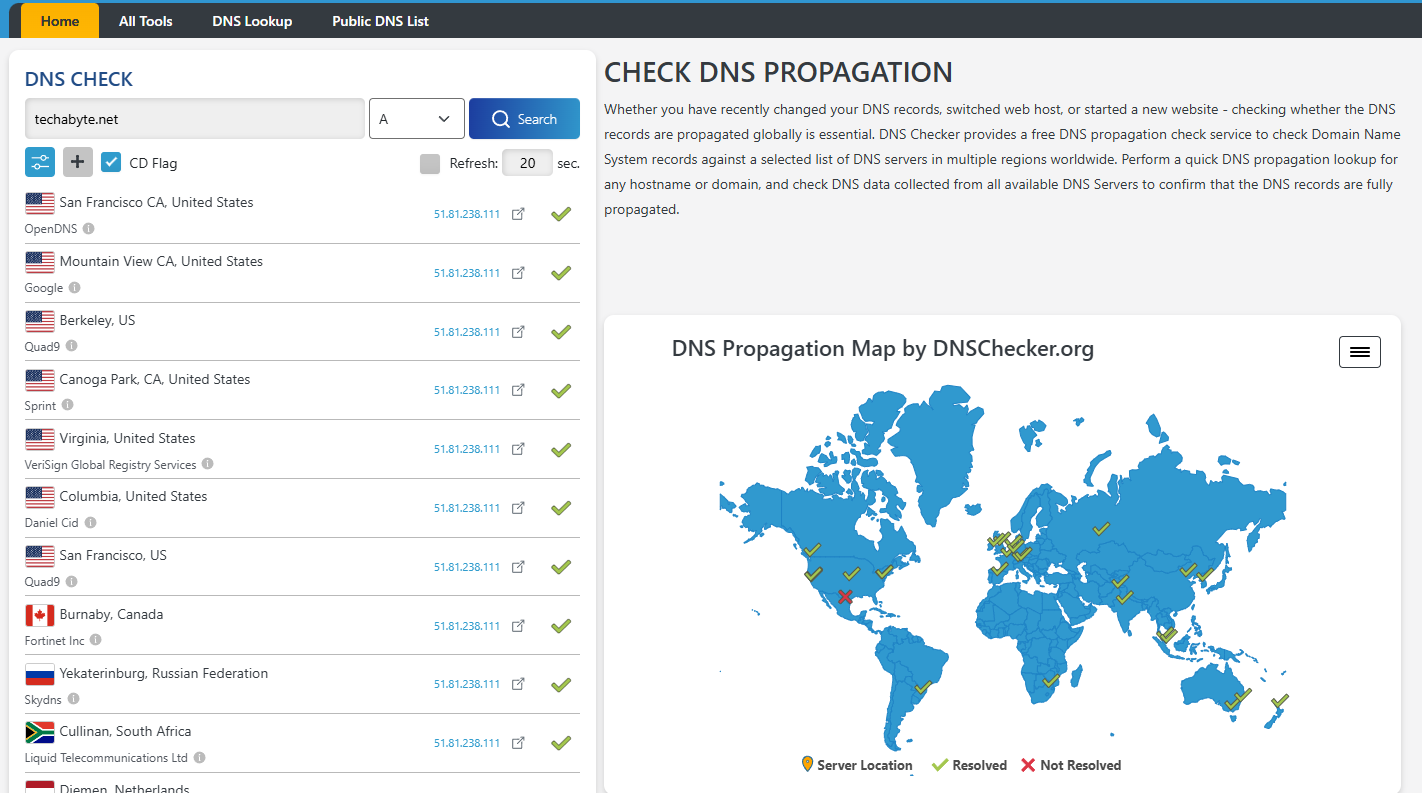
Step 5:
To check if your DNS is working properly. Got to – https://dnschecker.org/ and then enter your domain and DNS type. There, you will see all the active DNS Propagation Map.
(Follow the Steps if you are connected with BDIX server)
Well, for this first you just need to order BDIX hosting server from our panel. Then, connect your domain with this hosting.
And to manage the BDIX DNS from our panel just go to DNS management and manage rest is like as cPanel UI of DNS Records – Zone Editor. Also don’t forget to check if it’s working with https://dnschecker.org/.
These name servers allow you to access and manage your DNS settings through Techabyte’s Client Area. This gives you the flexibility to make adjustments to your DNS records when necessary.
Domain Propagation
Domain propagation is the process of updating name servers around the world following any changes to your DNS records. It can take up to 48 hours to complete. This means that your site may not be accessible from all devices, or may appear as insecure during this time.
For example: here are the complete guidelines to avail any name servers from Techabyte to follow:
Step 1:
Open the website: Go to “https://www.techabyte.xyz/order/ and successfully register with a valid email.
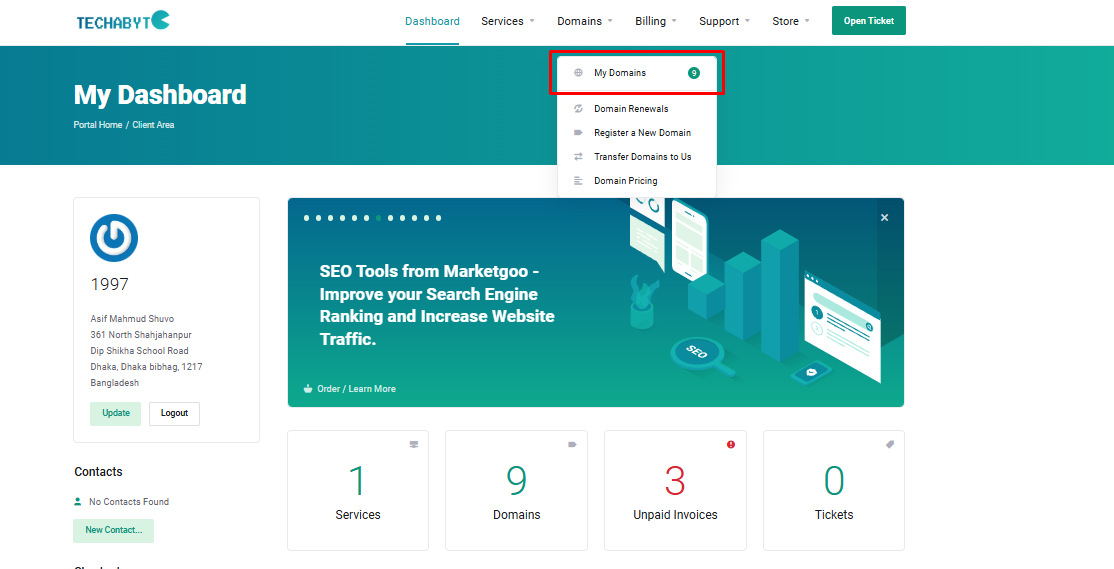
Step 2:
After completing the registration you will get a dashboard like this.

Step 3:
If you want to order any of the name servers of ours like:
– Techabyte Default Nameservers
– BDIX Connected/BD Datacenter Shared Hosting Nameservers
– Europe and USA Data Center Nameservers
– Cloudflare Nameservers

Go to services. Then, click on the “Order New Services” option
Step 4:
Here you will see a lot of categories of services that you can choose from.
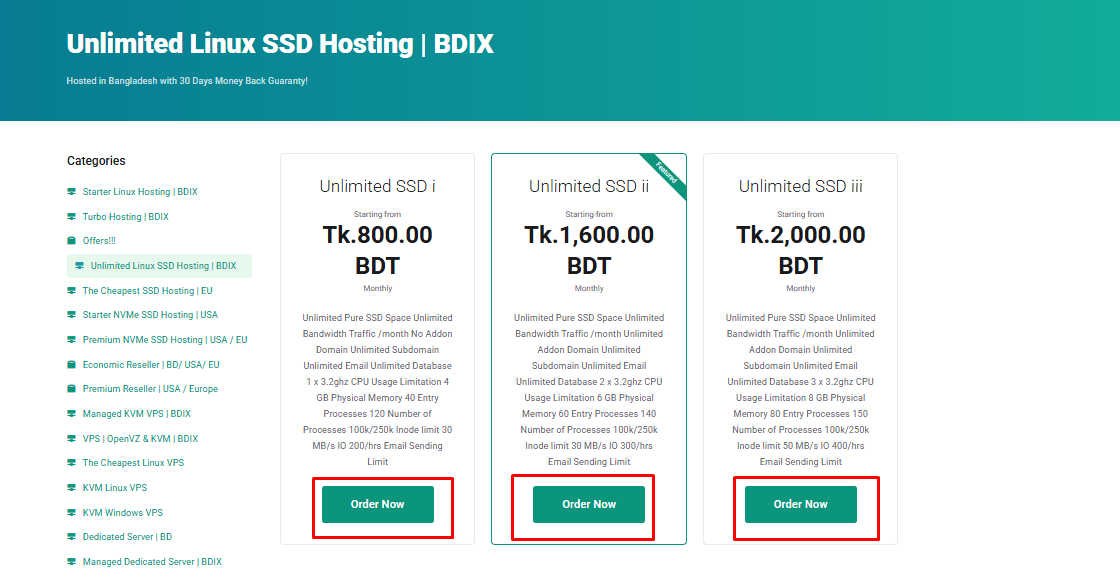
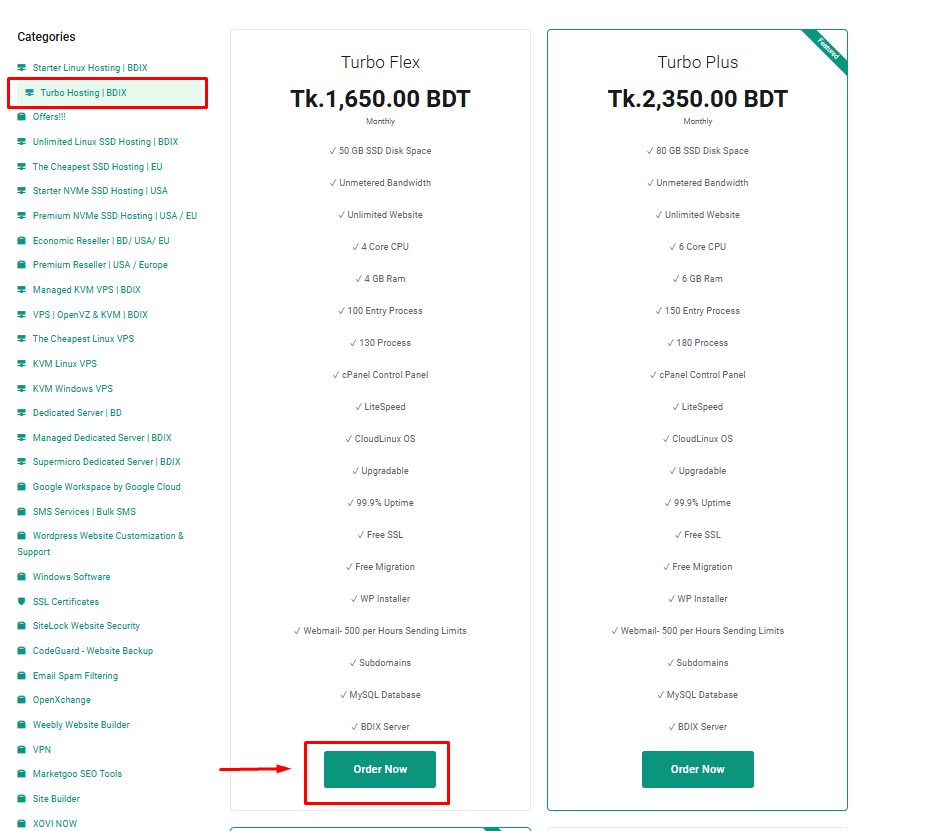
For example: I am selecting “Turbo Hosting | BDIX”
Step 5:
After selecting Turbo Hosting | BDIX, you will see a few packages under it. You can order any of the packages under Turbo Hosting | BDIX by just clicking the “Order Now” option.
Step 6:
After clicking on “Order Now”, You will get on the Choose a Domain page.
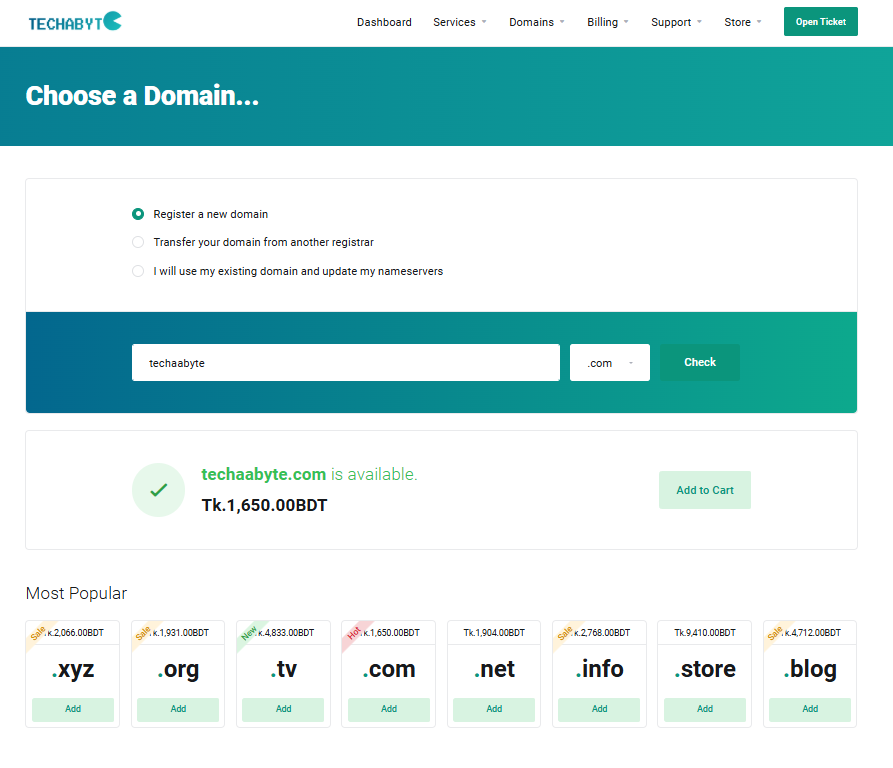
Here, you can search for your desired domain. If it’s available you can select “Add to cart” to order.
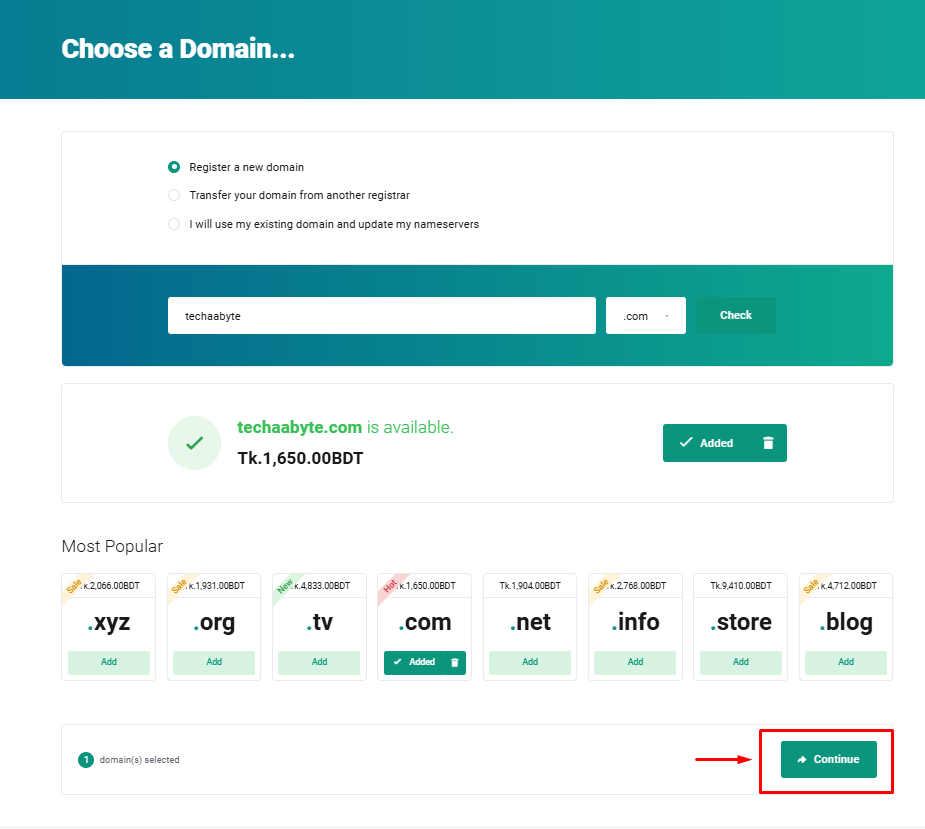
Step 7:
After adding your selected domain to the cart. Click on the “Continue” button.
Step 8:
Then, the configure page will appear. Where you will be able to custom you package with multiple options like
– Different billing cycle
– Add ons
– Website Builder
– Email Security
– Website Security
– VPN and Website Backup
– SEO Tools & a lot more.
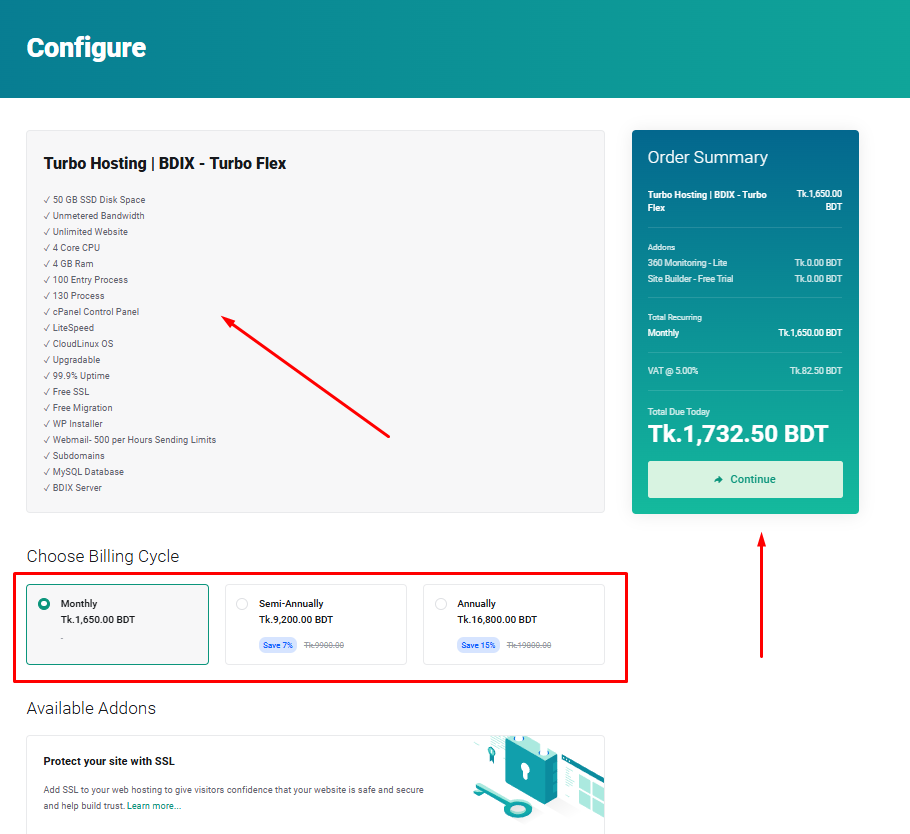
Select and adjust options as per your need. And then click on the Continue button.
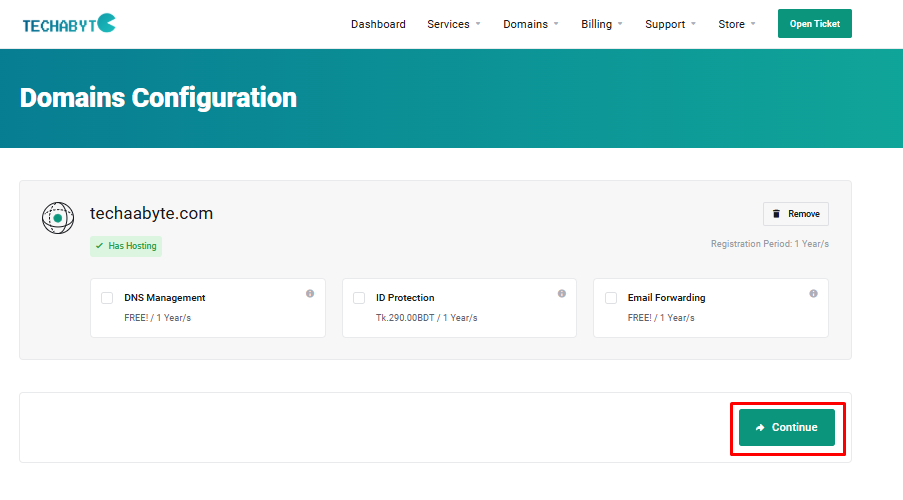
Step 9:
Here you will see the final overview of your selected service package. If everything is okay, click on the Continue button.
Note: If you do not select DNS Management here, then later you won’t be able to manage DNS. So, choose carefully before continuing.
Step 10:
Here, you will find all the products that you have ordered to checkout.
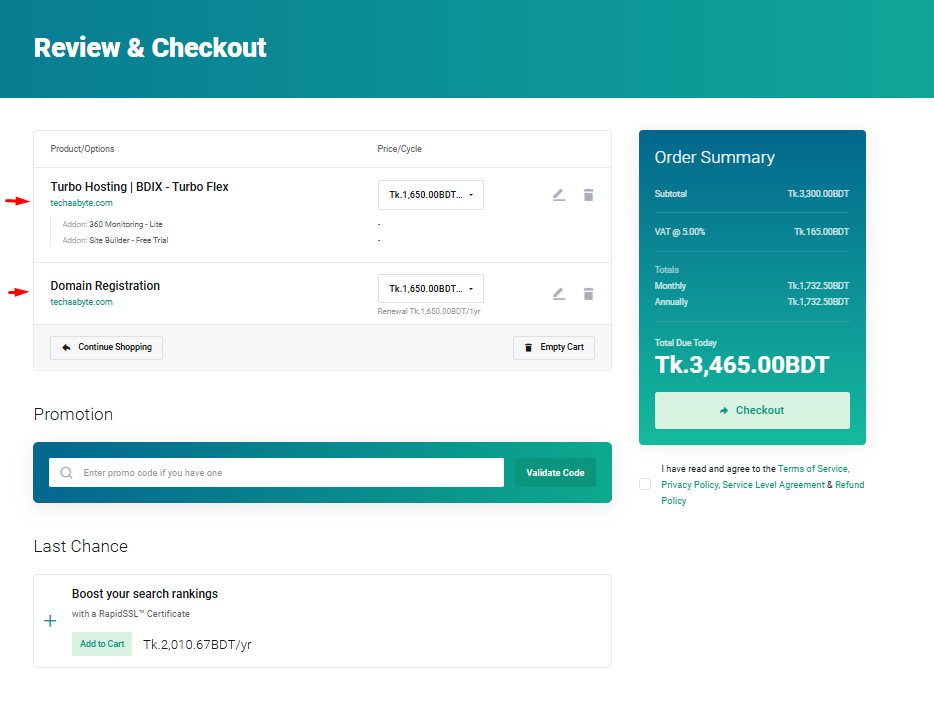
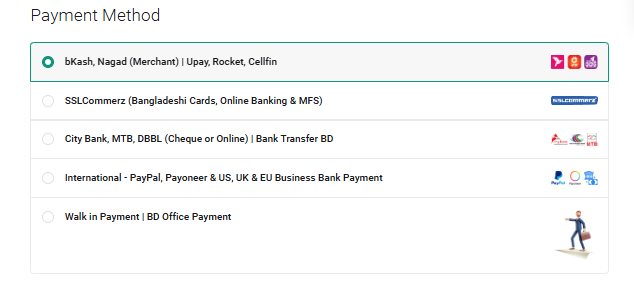
Also, you can select multiple payment methods like Mobile banking, SSLCommerz, International payment gateway, or event Walk-in payment to complete the order.
Key Takeaways
- Nameservers are essential in pointing your domain to the correct hosting server.
- NS records determine which nameservers are responsible for your domain’s DNS queries.
- Using the right server for a specific nameserver ensures optimal DNS performance, security, and uptime for your website.
- Techabyte’s nameservers offer reliable DNS services, whether you’re on shared hosting in Bangladesh or hosting in Europe and the USA.
Conclusion:
Choosing the right nameserver and server setup is critical to ensuring smooth and efficient domain management. Whether you are using Techabyte’s default nameservers or leveraging a Cloudflare CDN, understanding how NS records and nameservers work will give you better control over your domain’s performance and availability. Always make sure to configure your nameservers according to the geographical location of your hosting service to provide the best experience for your website visitors.